|
|
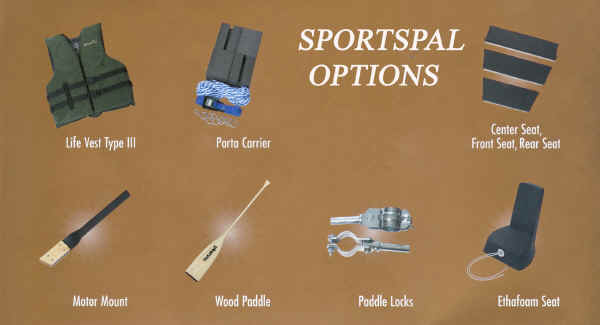
Parts for Sportspal
Canoes
Instructions for Repair and
Replacement of Liners, Seats, Sponsons, Ribs
 |
|
To Order Sportspal
Parts Call 1-800-247-6275
or 1-517-265-9821
between the hours of 8 AM to 4 PM Eastern Time Monday thru Friday |
|
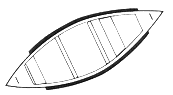
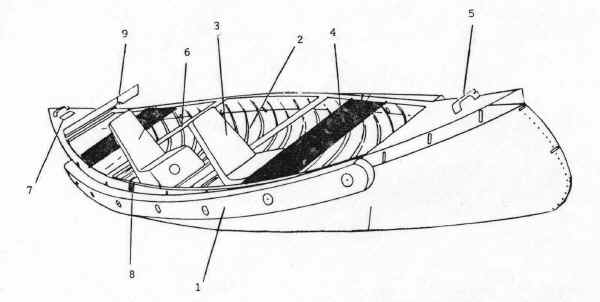
Sportspal Canoe By Meyers - Parts
Diagram |
 |
|
Scroll Down the Page for Parts
Description |
|
And for Repair and Installation
Instructions |
PARTS LIST FOR SPORTSPAL
CANOES
|
To order parts, you must supply the following information: Length, Color, Double-End or Square
Stern Model Type (Old Style, New Style)
Old Style is a one piece hull, folded on seams, hull has raised seams on sides New Style is a two piece hull, joined at keel, hull
sides are smooth
Please include name/model boat, year/serial number and color if applicable. We have all Sportspal
Parts available. |
Contact Us for Assistance
|
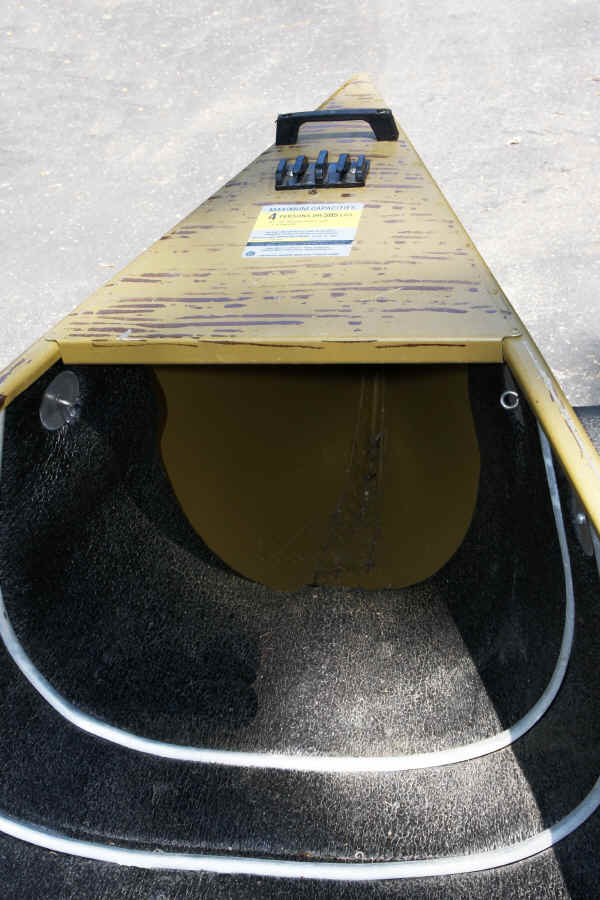
How to Replace Sportspal Sponsons |
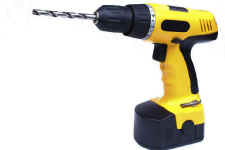
| Tools needed: Electric Drill with a 3/16"
Drill Bit, Screwdriver, Crescent Wrench |
| Note: Be sure to follow all OSHA Safety Guidelines when using
tools. |
| |
|
Removing The Old Sponsons
|
|
Remove the old Sponsons by unbolting them from the
canoe.
Some older models had rivets instead of bolts - Use a drill to
remove the rivet head. Clean and scrape the metal smooth. |
 |
| |
|
Installing The New Sponsons |
| Using the pattern marks left by the old Sponsons - align the
new Sponson on the canoe. It may be helpful to tape it in place
with masking tape. Staring on one end, Drill a pilot hole from the inside
and slowly push the Drill Bit through the existing bolt hole from the
old hardware. Hold the Sponson Firmly in place while you do this to make
sure it is straight and centered. Be careful to keep your hands
clear of the drill bit when it pops through the Sponson. Using this pilot hole push the new bolt
through and attach the washers and nut. Continue down the side and
repeat this at each bolt hole until you complete the series of
attachments. New Sponson Sets come with new bolts, washers, nuts and
bungee cords. |
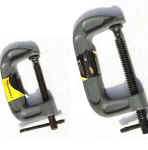
| NOTE: The
Eathafoam is tough & Resilient -The tools shown below may be needed
to install your sponsons.. Placing clamps on either side of the
bolts and washers will help compress the foam enough to attach the
washer and nut. Holes should be drilled thru the Sponsons in
order to allow the bolts to easily pass thru. |
| |
 |
 |
 |
|
How to Install Sportspal Gunwale
Seats |
| |
| Tools needed: Electric Drill with a 3/16"
Drill Bit, Screwdriver, Pliers or a Crescent Wrench |
| Note: Be sure to follow all OSHA Safety Guidelines
when using tools. |
 |
|
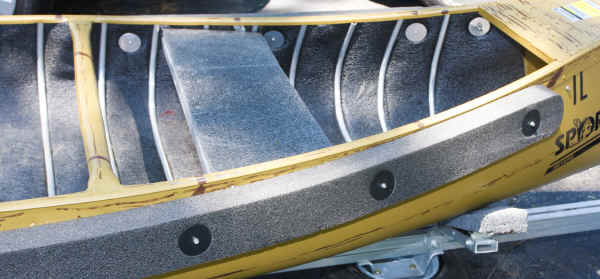
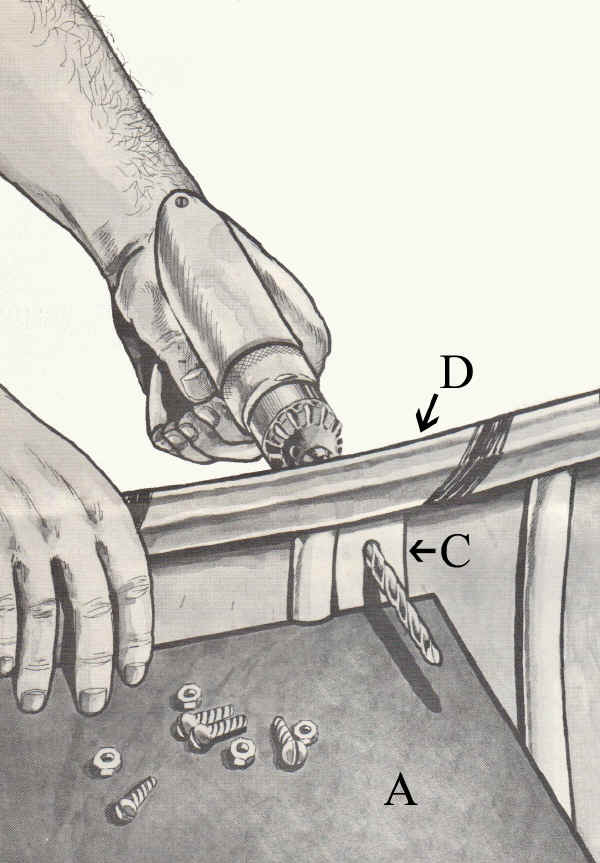
The Wide Gunwale Seat fits in the Front of the Sportspal Canoe.
The Narrow Gunwale Seat fits in the Rear of the Sportspal
Canoe |
| |
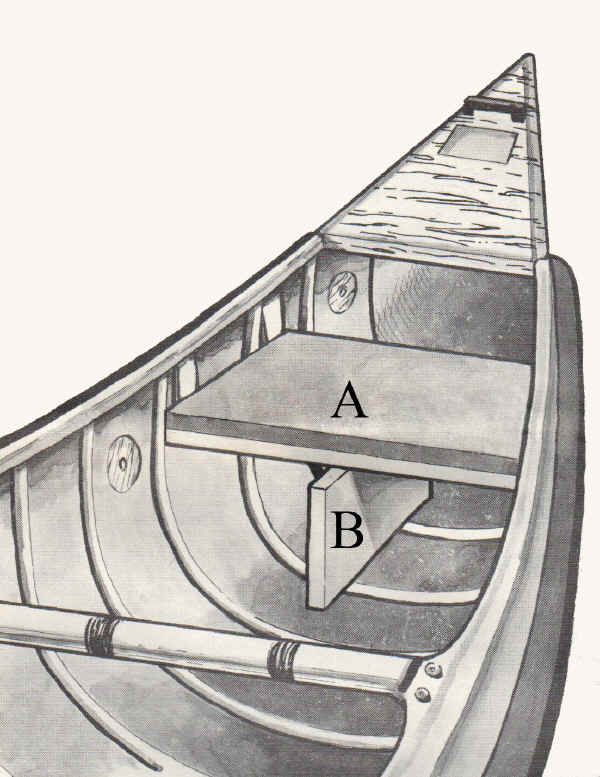
| Position the Seat in the Sportspal Canoe so that the
metal tabs "C" are at tight against the Eathafoam
Liner. Push the Seat "A" upwards so the metal tabs
go under the Gunwale Lip "D" and rest touching the underneath
of the Gunwale Lip. Use a Wooden Board "B" to
temporarily hold the seat level in this position. |
 |
| |
| Drill a 3/16" hole through both the Gunwale Lip
"D" and the Seat Tab "C". Drill the hole in
the center of the tab about 1" below the top of the
gunwale.. You may have to push the outside Sponson down slightly
to allow clearance for the drill. Make sure you are drilling
through the thicker portion of the gunwale and not just the side of the
boat. Be careful not to damage the seat when the drill bit pops
through. As you drill each hole, insert one of the screws into the
hole to hold the seats position. After you drill all the
holes attach and thoroughly tighten each nut. |
 |
| Remove the temporary shim Board "B",
and you are ready to enjoy your new seats. |
|
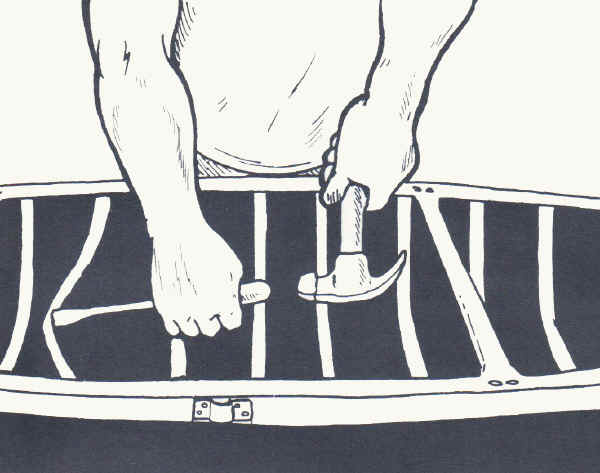
How to Replace Sportspal Canoe Ribs |
| Tools needed: Hammer, Wide Flat Blade Screwdriver,
Hacksaw, Rubber Mallet |
| Note: Be sure to follow all OSHA Safety Guidelines when using
tools. |
| WARNING - The Ribs are
under pressure and may spring out when released. Wear Safety
Glasses, and keep your face well away from the rib. Keep your
hands firmly on the rib while removing or replacing the rib. |
| |
|
Removing The Old Rib |
| Insert a Wide Flat Blade Screwdriver under the Rib. Take care
not to damage the Eathafoam Liner. Knock the Rib out of
place with a Hammer on the handle of the Screwdriver. Reach in
with your hand and pull the rib in the same direction you knocked
the rib until both ends of the rib slip out from under the Gunwale
Lip. If the rib is damaged, take care not to cut your hand on any
broken metal. |
 |
| |
|
Installing The New Rib |
| Line up the New Rib with the indentation in the liner made by the
old rib.. The Rib has a Short End and a Long End. Test fit
by slipping the
Short End under the Gunwale Lip on one side. Ribs are made longer
than needed and must be trimmed. Now mark the longer side
1/2" higher than the top inside of the Gunwale Lip.
Remove the rib and cut the Long End where you marked it. Again,
slip the Short End of the Rib under the gunwale lip. Now Wedge the
long end under the Gunwale Lip using a Wide Blade Screwdriver to
"Pop" it in under the Gunwale. Once again, be careful as
the ribs are under tension. After installing all the needed Ribs, use a
Rubber Mallet to strike the top of the gunwale above each rib to seat it
into place. |
|
|
 |
| Wedging the end of the Rib under the Gunwale Lip sometimes pushes
the lip out a little. Using a mallet of a hammer with a block of
wood, you can tap the gunwale into it's former condition. |
|
How to Replace The Sportspal Liner |
| Tools needed: Screwdriver, Crescent Wrench, Rubber Mallet |
| Note: Be sure to follow all OSHA Safety Guidelines when using
tools. |
| WARNING - The Ribs are
under pressure and may spring out when released. Wear Safety
Glasses, and keep your face well away from the rib. Keep your
hands firmly on the rib while removing or replacing the rib. |
|
|
|
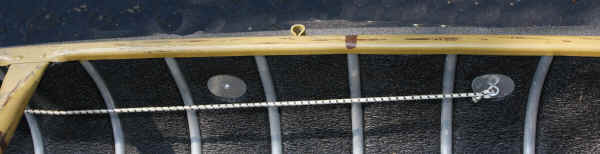
Removing The Old Liner |
|
Remove the Sponson Hardware |
| The Sponson Hardware uses a set of Large Washers on the inside of
the canoe. These help to retain the Liner. Using a wrench
unbolt the hardware and remove the washers. |
 |
| |
|
Remove the Ribs |
| To remove the old liner, you will have to remove all of the
Ribs. Once again, be careful as
the ribs are under tension. Number the ribs with a piece of tape on each one.
Then put a corresponding numbered piece of tape on the
canoe's gunwale lip so you can put them back in the same place.
You can follow the instructions under "How
To Replace Sportspal Canoe Ribs" , but if
you need a new liner, it is likely that the ribs will be fairly loose
due to the old liners condition. In that case, use a screwdriver
to gently lift the center of the rib upward so you can grasp it.
Pull the rib gently towards one end of the canoe as if you were pulling
back on a child's swing until the ends of the ribs slip out of the
gunwale lip. After removing all the ribs - Peel the
old liner out of the canoe. |
 |
| |
|
Installing The New Liner |
| The new liner is supplied as a rectangle. Lay the old
liner on top of the new liner and use it as a pattern to cut the new
liner. Now insert the new liner into the canoe.
If the old liner is not available or out of shape, press the new liner
into the canoe and trim the excess off to fit. |
| |
| Reinstall the Ribs in the positions that you numbered when you
first removed them. Follow the directions found under "How To
Replace Sportspal Canoe Ribs". Then Replace the Sponson
Hardware. |
|